
If you’ve recently updated your website, purchased a new domain, or deleted specific pages, you’ve likely encountered the need to use 301 redirects. A 301 redirect is a permanent redirect that tells search engines and browsers that a specific page has permanently moved to a new address. This is crucial for preserving SEO and preventing a drop in page rankings on search engines. Without redirects, users and search engines will be directed to incorrect pages, which can result in lost traffic and lower rankings for your site. In this guide, we will show you how to implement 301 redirects in your .htaccess file to ensure your site uses this technique correctly.
What is .htaccess File?
Before diving into how to set up redirects, let’s briefly discuss the .htaccess file. The .htaccess file is a configuration file commonly used in the root directory of websites hosted on Apache servers. This file allows you to make various settings, such as managing access, configuring redirects, enhancing security, and more. One of the most common uses of the .htaccess file is setting up redirects.
The .htaccess file allows you to:
- Manage access and permissions
- Configure redirects
- Improve security
- Customise server behaviour
- One of its most common uses is setting up redirects, including 301 redirects.
Why Use 301 Redirects?
301 redirects are important for several reasons:
- Preserve SEO: When a page moves to a new URL, search engines like Google recognise the 301 redirect and transfer the link value and ranking to the new address.
- Prevent 404 Errors: If a page is deleted or its URL changes, users will encounter a 404 error without a 301 redirect. This negatively affects both user experience and SEO.
- Facilitate Domain or Site Structure Changes: If you’ve purchased a new domain or changed your site’s URL structure, redirects help preserve traffic and rankings.
How to Set Up 301 Redirects in .htaccess File
Step 1: Accessing the .htaccess File
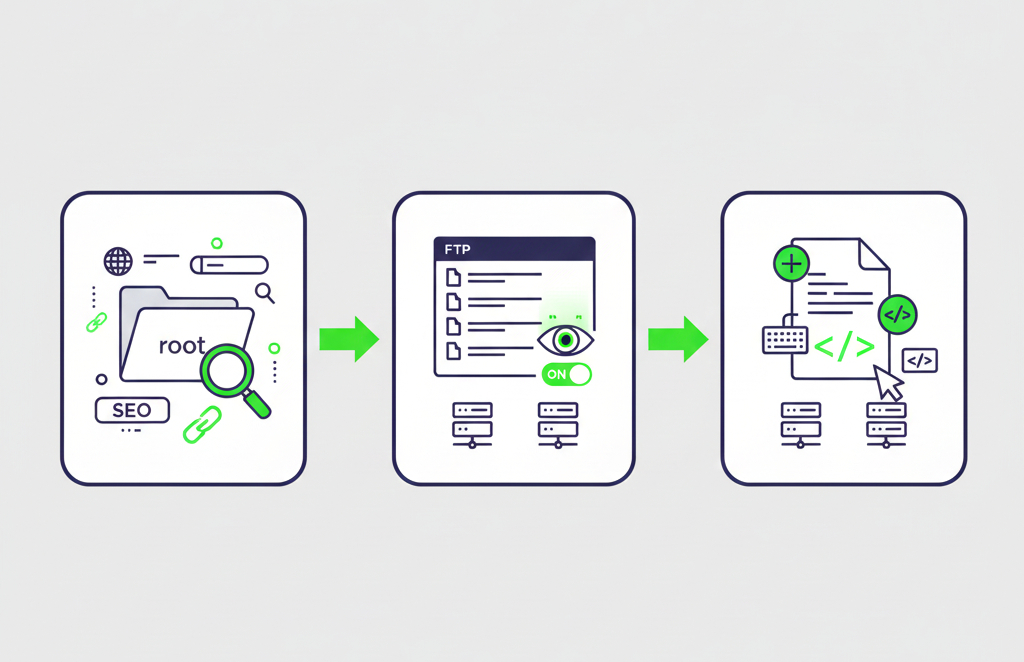
- To get started, you need to access your website’s .htaccess file, which is usually located in the root directory of your site.
- If you can’t find the .htaccess file, it may be hidden. In that case, you’ll need to enable the option to view hidden files in your FTP client or hosting control panel.
- If the .htaccess file doesn’t exist, you can easily create one. Simply create a new text file and save it as .htaccess.
Step 2: Writing the 301 Redirect Code
Now that you have access to the .htaccess file, you can add the 301 redirect code. To add a 301 redirect, use the following code:
Redirect 301 /old-page.html https://www.yoursite.com/new-page.html
Explanation:
/old-page.html: This is the old page URL that you want to redirect to the new page.
https://www.yoursite.com/new-page.html : This is the new page URL where users and search engines should be directed.
Step 3: Redirecting a Whole Directory
If you want to redirect all pages from one directory to a new directory, you can use the following code:
Redirect 301 /old-directory/ https://www.yoursite.com/new-directory/
This code will redirect all pages in the old directory to the new directory.

Step 4: Redirecting a Domain to a New Domain
If you want to redirect all pages of your site to a new domain, you can use the following code:
RewriteEngine On
RewriteCond %{HTTP_HOST} ^oldsite.com$ [NC]
RewriteRule ^(.*)$ https://www.newsite.com/$1 [L,R=301]
This code will redirect all pages from the old domain to the new domain.
Step 5: Redirecting www to non-www (or the Reverse)
Search engines treat https://www.yoursite.com and https://yoursite.com as two separate sites, so pick one version and permanently redirect the other to it. To send www traffic to the non-www version, add:
RewriteEngine On
RewriteCond %{HTTP_HOST} ^www\.yoursite\.com$ [NC]
RewriteRule ^(.*)$ https://yoursite.com/$1 [L,R=301]
To go the other way, swap the condition to match the bare domain and point the rule at the www version instead.
Step 6: Testing the Redirects
After adding the redirect code to your .htaccess file, you should always test its functionality. To do this, enter the old URLs in your browser and check that they are properly redirected to the new pages. You can also use tools like Redirect Checker or Google Search Console to verify that the redirects are working correctly.
Why Is Your .htaccess 301 Redirect Not Working?
If your redirect refuses to fire, the cause is almost always one of six things. Work through this list in order before rewriting your rules:
- Caching: browsers and CDNs cache 301 redirects aggressively. Test in a private window, clear your CDN or caching plugin, and try a device that has never visited the old URL.
- Missing RewriteEngine On: every RewriteRule needs RewriteEngine On above it, otherwise the rule is silently ignored.
- Rule order: Apache reads the .htaccess file top to bottom. On WordPress sites, place custom redirects above the # BEGIN WordPress block, or WordPress’s own rewrite rules can catch the request first.
- Mixing directives: Redirect 301 (mod_alias) and RewriteRule (mod_rewrite) are processed by different Apache modules and can conflict when they touch the same URL. Choose one approach per redirect.
- .htaccess disabled by the server: if your host sets AllowOverride None, Apache ignores the file entirely. Ask your host to confirm .htaccess overrides are allowed.
- Syntax errors: a single typo can return a 500 error across the whole site. Always keep a backup copy of the file before editing.
To confirm what the server is actually returning, run curl -I on the old URL from a terminal, or use the URL Inspection tool in Google Search Console. A working redirect shows a 301 status followed by the new location.
Common Mistakes to Avoid
- Not including the protocol (HTTP or HTTPS): Make sure to enter URLs with the correct protocol (http:// or https://).
- Incorrect URL path: The URL path must be exact and complete. Even a small mistake can cause the redirects to fail.
- Redirect chains: pointing page A to page B and page B to page C wastes crawl budget and dilutes link equity. Always redirect the old URL straight to the final destination.
Conclusion
Using 301 redirects in the .htaccess file helps you make structural changes to your website without losing traffic or SEO ranking. When implemented correctly, you can provide a better user experience and benefit from SEO advantages. If you encounter any issues while setting up these redirects, you can always use tools like Google Search Console to verify the redirects and catch crawl errors early.
Redirect problems rarely travel alone: they usually come with crawl errors, redirect chains, and indexing issues. Our technical SEO services cover full redirect mapping and clean-up, or you can start with a free SEO audit to see exactly what is holding your site back.
FAQ
What is a 301 redirect?
A 301 redirect is a permanent redirect from one URL to another. It tells browsers and search engines that a page has moved permanently, helping preserve SEO value and link equity.
Why should I use 301 redirects?
301 redirects help maintain search rankings, prevent 404 errors, and ensure users are directed to the correct pages after URL or domain changes.
Where is the .htaccess file located?
The .htaccess file is usually in the root directory of your website on an Apache server. It may be hidden, so you might need to enable “show hidden files” in your FTP or hosting panel.
What if my .htaccess file doesn’t exist?
You can create a new text file named .htaccess in the root directory and add your redirect rules.
Why is my .htaccess 301 redirect not working?
The most common causes are cached redirects in your browser or CDN, a missing RewriteEngine On line, rules placed below the WordPress rewrite block, or mixing Redirect and RewriteRule directives on the same URL. Clear your caches, check the rule order, and test again in a private window.